Nginx can slow down abusive clients before they reach PHP or your database. The limit_req module restricts how many requests one address may send to a given path. Used on login pages and APIs it removes much of the pressure from brute force and scraping, without affecting normal visitors. This guide shows a safe configuration, how to test it and the mistakes that block real users. Commands follow the nginx documentation; I did not run them on your server.
1. Define a zone and apply it to one path
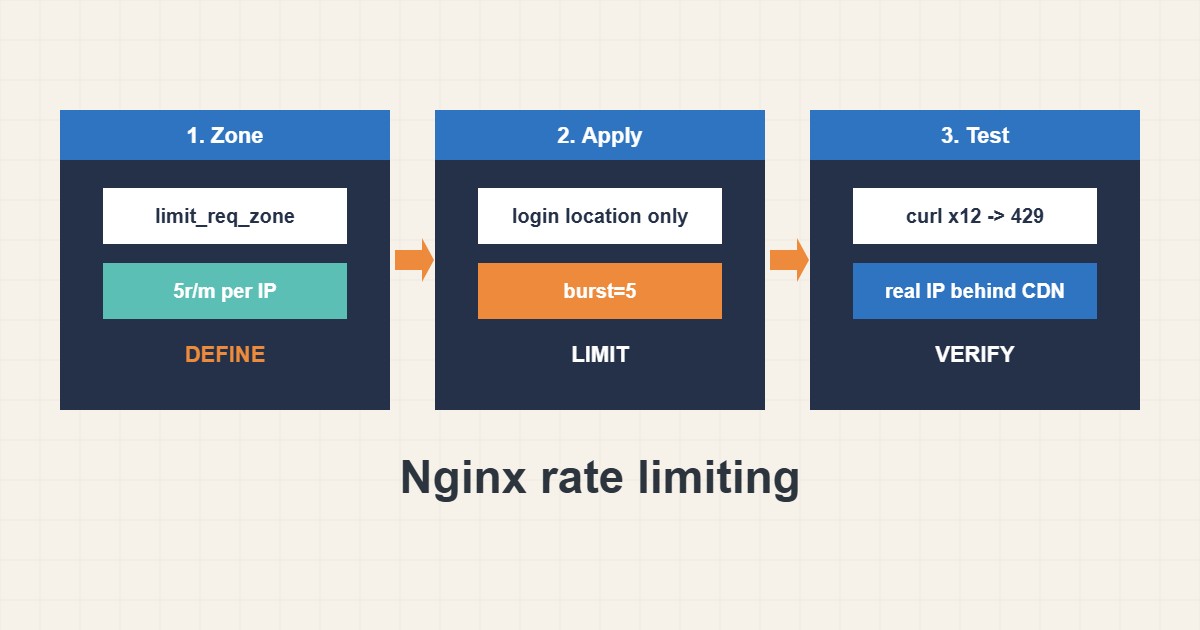
Create a shared memory zone keyed by client address, then attach it only to the sensitive location:
# http { } context
limit_req_zone $binary_remote_addr zone=login:10m rate=5r/m;
limit_req_status 429;

# server { } context
location = /wp-login.php {
    limit_req zone=login burst=5 nodelay;
    include fastcgi_params;
    fastcgi_pass unix:/run/php/php8.2-fpm.sock;
}
The rate of five requests per minute with a small burst suits a login form. Do not start with the whole site.
2. Test and watch the log
Check the syntax, reload and send a quick series of requests. You should see 429 after the burst is used up, and nginx logs the limit:
sudo nginx -t && sudo systemctl reload nginx
for i in $(seq 1 12); do curl -s -o /dev/null -w "%{http_code} " https://example.com/wp-login.php; done; echo
sudo grep -i 'limiting requests' /var/log/nginx/error.log | tail -n 5
If the numbers look wrong, adjust the rate or burst gradually.
3. Handle CDN, proxies and your own address
Behind a CDN or reverse proxy, nginx sees the proxy address unless you configure the real client IP. Otherwise all visitors share one limit. You may also exempt your own address:
# Behind a CDN or proxy, use the real client IP, not the proxy address
set_real_ip_from 203.0.113.0/24;
real_ip_header X-Forwarded-For;

# Allow your own address
geo $limited { default 1; 198.51.100.7 0; }
map $limited $limit_key { 0 ""; 1 $binary_remote_addr; }
Header and proxy details are covered in the location matching guide.
4. Combine with other defenses
Rate limits slow requests; they do not replace strong passwords or updates. Pair them with the WordPress login hardening guide and with temporary bans from fail2ban. Monitor 429 counts so you notice both attacks and false positives.
5. Mistakes to avoid
These settings cause the common problems:
rate=1r/s on the whole site          # normal visitors with many assets get 429
no real_ip config behind a CDN        # every visitor shares one IP and is limited together
limit_req without burst               # short legitimate bursts are rejected
Always keep a way to test from an allowed address.
6. Illustrative example, not a measurement
Imagine a small shop (made-up) that sees hundreds of login attempts per hour from a few addresses. The admin adds a login zone with five requests per minute and a small burst. A test shows 429 after the burst, normal logins keep working and PHP load drops during the attack.
7. Common mistakes
- Limiting the whole site with a low rate.
- Not configuring the real client IP behind a CDN.
- Using no burst at all.
- Forgetting to reload after nginx -t.
- Not watching the log for false positives.
- Believing rate limits replace passwords.
8. Frequently asked questions
What does burst do? It allows a short queue of extra requests before rejecting.
What does nodelay do? It serves burst requests immediately instead of spacing them.
Which status code should I return? 429 Too Many Requests is the clear choice.
Does it stop distributed attacks? Not alone. Use a CDN or firewall for that.
9. Quick checklist
- Define limit_req_zone.
- Apply it to one path.
- Add a small burst.
- Run nginx -t and reload.
- Test with curl.
- Configure real IP behind a CDN.
- Watch the log.
If you need help reviewing performance or maintaining a server, see the server management services.
More server and WordPress guides are collected in the article archive.
Official references
nginx: ngx_http_limit_req_module · nginx: ngx_http_limit_conn_module · nginx: ngx_http_core_module · NGINX blog: Rate Limiting with NGINX