
Most firewall lockouts don’t happen because someone didn’t know what a firewall does. They happen at 11 pm, on a remote server, when a rule that “should only take a second” closes the one door you were standing in. The usual outcome is a trip to the provider’s web console and an awkward hour of undoing it.
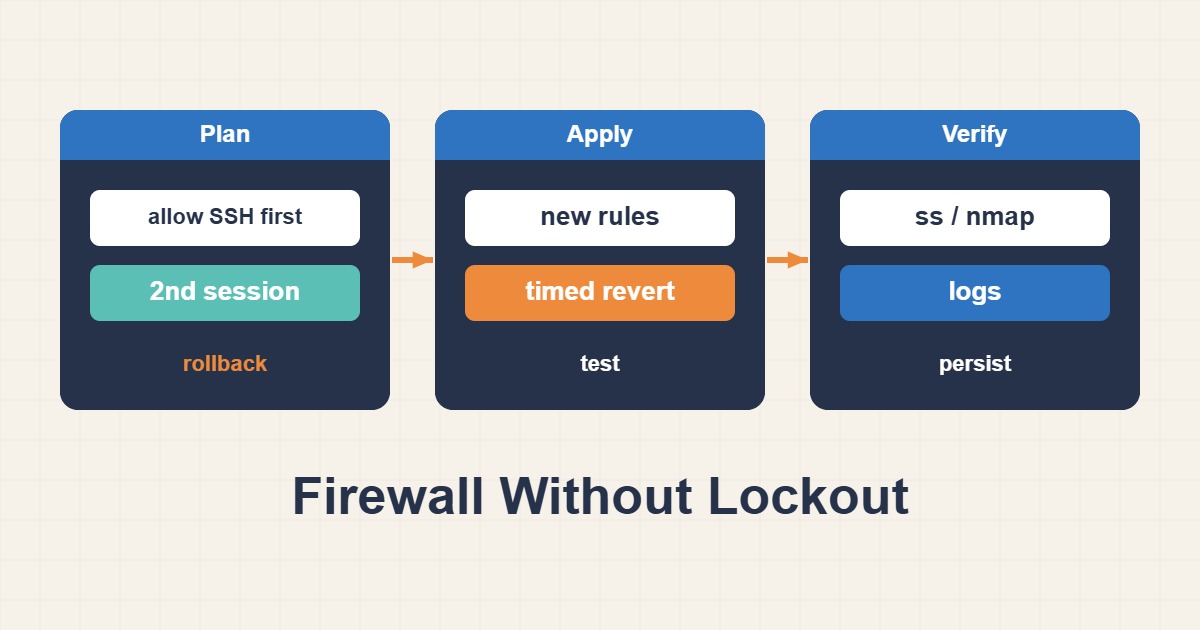
The good news is that a lockout is almost always preventable with a few habits: keep a second session, take a snapshot of the rules, schedule an automatic rollback, and test from a fresh login before you relax. This guide walks through that routine for UFW and nftables on a typical Debian or Ubuntu server.
1. Why lockouts happen
The same handful of mistakes show up again and again:
- Enabling a default-deny policy before the SSH rule exists.
- Moving sshd to another port and forgetting to open that port in the firewall.
- Writing IPv4 rules while the server is reached over IPv6, or the reverse.
- Restricting SSH to an IP address that changes, such as a home connection or a mobile hotspot.
- Applying a whole ruleset from a file with a typo, then discovering it only half loaded.
- Forgetting that a cloud provider’s own firewall or security group sits in front of the server.
There’s one more trap that makes the whole thing feel safe when it isn’t. Firewalls keep state, so your current SSH session usually survives a bad change. The failure only appears when you open a new connection, which is often after you’ve already closed the working one.
2. Prepare before you touch anything
Keep the current SSH session open and start a second one next to it. Make sure you know how to reach the provider’s emergency console (VNC, serial or rescue mode) and that you can actually log in there with a local password. Then record where you’re connecting from and what is listening:
echo $SSH_CLIENT
sudo ss -tlnp | grep -E 'sshd|nginx|apache'
sudo ufw status numbered
The first line prints your source IP and the local SSH port. The second shows which services are really listening, which is worth knowing before you decide what to allow. Then take a backup you can restore from:
# UFW
sudo cp -a /etc/ufw /root/ufw-backup-$(date +%F)

# nftables (flush first, so the file replaces the live ruleset)
( echo "flush ruleset"; sudo nft list ruleset ) | sudo tee /root/nft-known-good.conf >/dev/null
3. Add a rollback timer
This is the single most useful trick. Schedule a command that undoes the change, apply the change, and cancel the timer only after you’ve proven it works. If you lock yourself out, the server repairs itself a few minutes later.
# UFW: disable the firewall in 5 minutes unless cancelled
sudo systemd-run --on-active=5m --unit=fw-rollback /usr/sbin/ufw disable

# nftables: restore the known-good ruleset instead
sudo systemd-run --on-active=5m --unit=fw-rollback /usr/sbin/nft -f /root/nft-known-good.conf
Disabling UFW as the rollback leaves the server unfiltered for a short time, which is why the timer is short and why you should re-enable the firewall once you’ve fixed the rule. Cancel the timer when you’re done with sudo systemctl stop fw-rollback.timer. Nobody remembers this step at the worst moment, so write it at the top of your notes before you begin.
4. UFW: the safe order of operations
Allow the way in first, then change defaults, then enable:
sudo ufw allow from 203.0.113.10 to any port 22 proto tcp comment 'admin SSH'
sudo ufw limit 22/tcp comment 'SSH, rate limited'
sudo ufw allow 80,443/tcp comment 'web'
sudo ufw default deny incoming
sudo ufw default allow outgoing
sudo ufw enable
Use the from rule only if your source IP is stable. If it isn’t, rely on limit, which refuses an address that opens six or more connections within thirty seconds, and combine it with key-only SSH. ufw enable will warn that it may disrupt existing connections. The UFW manual notes that enabling the firewall can drop current connections, so add the SSH rule first and treat that warning as a reminder to test a new login.
Also check that IPv6 is covered. In /etc/default/ufw the line IPV6=yes makes UFW write rules for both families; sudo ufw status verbose then shows entries marked (v6).
5. nftables: check the file before loading it
nftables can validate a ruleset without applying it, and that’s the cheapest insurance you’ll find:
sudo nft -c -f /etc/nftables.conf   # syntax check only
sudo nft -f /etc/nftables.conf      # apply
A minimal inbound policy that keeps SSH and web traffic open looks like this:
table inet filter {
  chain input {
    type filter hook input priority 0; policy drop;
    ct state established,related accept
    iif "lo" accept
    ip protocol icmp accept
    ip6 nexthdr icmpv6 accept
    tcp dport 22 accept
    tcp dport { 80, 443 } accept
  }
}
Don’t drop ICMPv6 on an IPv6-enabled host. Neighbor discovery depends on it, and removing it breaks connectivity in confusing ways that look nothing like a firewall problem.
6. Changing the SSH port without losing it
Treat a port change as an addition, not a replacement. Open the new port first, make sshd listen on both, test the new one, and remove the old one last:
sudo ufw allow 2222/tcp
# in /etc/ssh/sshd_config: keep "Port 22" and add "Port 2222"
sudo sshd -t && sudo systemctl reload ssh
ssh -p 2222 -o ConnectTimeout=5 user@server.example.com true
On recent Ubuntu releases SSH can be socket-activated, in which case the port comes from ssh.socket and not from sshd_config. Check with systemctl status ssh.socket before you assume the config file is in charge. Remove the Port 22 line and its firewall rule only after a clean login on the new port.
7. Test from a new session, then cancel the timer
From a third terminal, open a brand new connection with a short timeout. If it works, you’re done; if it hangs, the rollback will fix things shortly:
ssh -o ConnectTimeout=5 user@server.example.com 'echo ok'
sudo systemctl stop fw-rollback.timer
Only close the old session after both steps. Then list the final rules once more and save that output in your notes.
8. Docker and cloud firewalls change the picture
Two layers can make your rules look wrong when they aren’t. Docker writes its own iptables rules for published ports, and those usually bypass UFW’s input rules, so a container port can be reachable even though UFW says it’s closed. Our guide on publishing Docker ports safely covers binding to loopback and testing from outside. And if your provider has a security group, a rule has to pass both: a host rule that allows SSH does nothing if the cloud rule blocks it.
9. If you’re already locked out
Don’t keep guessing. Open the provider’s console or rescue mode, log in locally and run sudo ufw disable (or sudo nft flush ruleset) so you can get back in over SSH. Then rebuild the rule properly with the steps above. If a rollback timer was running, simply wait for it. Afterwards, review the hardening basics in securing SSH with keys and Fail2ban, since a firewall is only one layer.
10. Limit SSH to a management IP
If you have a fixed IP, the safest setup is to allow SSH only from that address. Replace 203.0.113.10 with your real one:
sudo ufw allow from 203.0.113.10 to any port 22 proto tcp
sudo ufw status numbered
If your IP changes, this rule locks you out, so use it only with the rollback timer armed and a second access path (the provider console). Without a fixed IP, rate limiting with ufw limit 22/tcp is the gentler option. Delete the old “allow 22 from anywhere” rule only after a fresh session has proved the new one works, never before.
11. Review the firewall rules and logs after the change
After every change, read the active rules once and confirm they match what you intended:
sudo ufw status numbered
sudo nft list ruleset
To see what the firewall rejects, turn logging on at the low level and switch it off after the review so the disk does not fill up:
sudo ufw logging low
sudo journalctl -k | grep UFW | tail -n 20
Lines starting with [UFW BLOCK] show dropped packets with the source IP and destination port. If your own connection is in there, a rule is wrong. Depending on the system, the log may also be in /var/log/ufw.log. Write the review result and the time of the change in your server notes.
12. Quick checklist
- Keep one working SSH session open and start a second.
- Know the provider console and confirm local login works.
- Back up UFW or nftables rules.
- Start a rollback timer.
- Allow SSH first, then set default deny, then enable.
- Test a new login, then cancel the timer.
If a server was rebuilt and SSH now warns about a changed host key, don’t bypass the warning: verify the fingerprint first.
More server troubleshooting guides are collected in the English article archive.
Official references
UFW manual (Ubuntu) · nftables wiki · systemd-run(1) · OpenSSH sshd_config