WordPress Toolkit is the part of Plesk that manages WordPress sites: installation, updates, cloning, staging, backups and security checks from one screen. It can save time and prevent careless mistakes, but only if you use it with a plan. Clicking “Update all” on a live store without a backup is the same risk as in any other panel. This guide shows a safe routine in WordPress Toolkit: look before you update, back up, update in small steps, test on a clone when it matters, and know how to go back. Available features depend on your Plesk version and WP Toolkit edition.
1. Open WordPress Toolkit and read the status
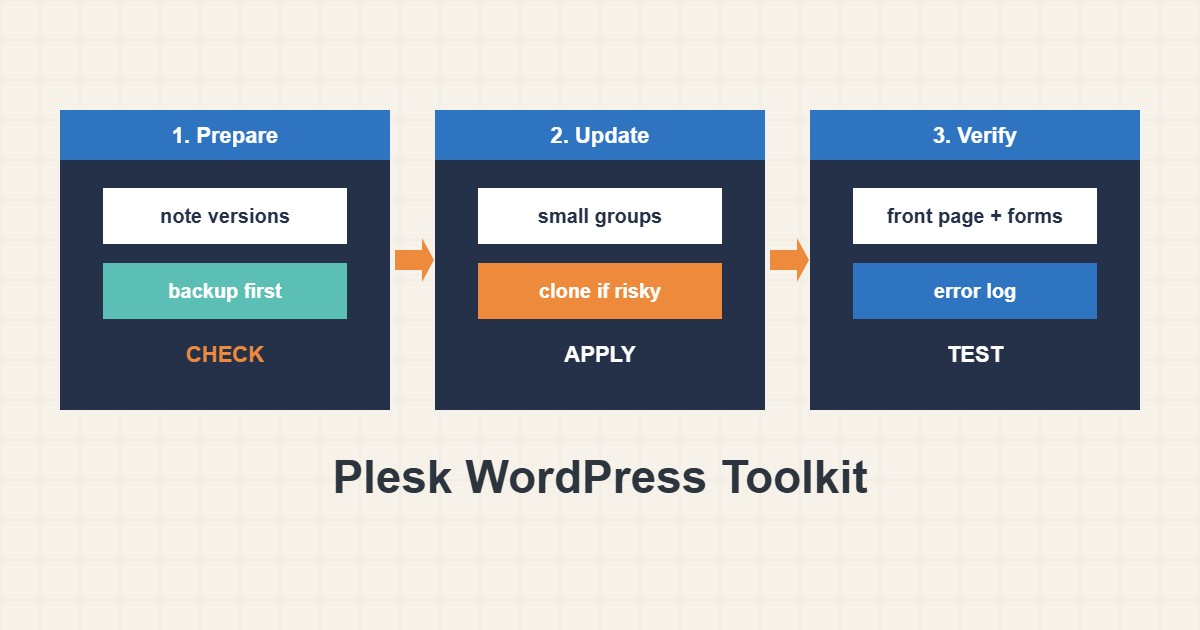
In Plesk open WordPress from the left menu (or from the domain’s page). Each installation shows its WordPress version, PHP version, available updates and security status. Before you change anything, note the current versions and look at whether the site works now. A site that is already broken is hard to judge after an update.
2. Take a backup first
Use the backup feature in the toolkit or the main Plesk Backup Manager, and keep a copy off the server. A backup you have never restored is only a hope, so test a restore at least once; see the safe WordPress update guide for the full routine that applies on any host. Do this before core, plugin or theme updates, and before changing the PHP version.
3. Update in small steps
Update one group at a time: first WordPress core, then plugins, then themes, and test between steps. Avoid updating twenty plugins together, because if the site breaks you will not know which one did it. Read the plugin’s changelog for major version jumps. Heavily customized themes and plugins that touch checkout, forms or membership deserve more care than a simple image plugin.
4. Use a clone for risky changes
WP Toolkit can clone a site, which creates a copy you can update and test while the live site stays untouched. Clone, apply the updates on the clone, click through the important pages and forms, and only then update the live site. Depending on your edition, there may also be an automated check that compares before and after. Make sure the clone does not send real emails, process real payments or get indexed by search engines; see the addon domains and moving WordPress guide for related ideas about copies.
5. Use auto-updates deliberately
The toolkit offers automatic updates for core, plugins and themes, and security-only options for core. Minor and security core updates are usually safe to automate. For plugins, enable auto-update on simple, well-maintained ones and keep critical ones on manual updates. Whatever you choose, still check the site weekly, because automatic does not mean verified.
6. Check security and read errors after updates
Run the security check and read the recommendations rather than applying all of them blindly; some change file permissions or settings that a particular plugin needs. After any update, open the front page, log in, submit a form and place a test order if you have a store. If something breaks, read the error log of the domain:
# After an update, read recent PHP errors for the domain (path varies by Plesk setup)
tail -n 30 /var/www/vhosts/system/example.com/logs/error_log
If a plugin is the cause, roll back with the backup or restore the previous plugin version, and report the problem to the plugin author.
7. Illustrative example, not a measurement
Imagine a site with 18 plugin updates available (made-up number). Updating everything at once breaks the checkout page. With a clone and small steps, you update six plugins, test, update six more, test again, and find that one specific plugin breaks checkout. You keep that one on the old version until a fix is released. The same total work, but the live site never goes down.
8. Common mistakes
- Updating on the live site without a backup.
- Using “Update all” for everything at once.
- Never testing the checkout, forms and login after an update.
- Letting clones send real emails or payments.
- Enabling auto-update for every plugin without a monitor.
- Applying every security recommendation without reading it.
9. Frequently asked questions
Is WordPress Toolkit included in every Plesk? Not always. It depends on the license and what your provider enabled, and some features are in paid editions.
Can I use it with sites installed outside the toolkit? Often yes. It can detect WordPress installations on the server and add them to its list.
Should I turn on auto-update for plugins? Only for simple, trusted ones, with a backup and monitoring. Keep complex plugins manual.
What if an update breaks the site? Restore from the backup you took, or roll back the single plugin. Then investigate on a clone.
10. Quick checklist
- Note current versions and check that the site works.
- Back up and keep a copy off the server.
- Update core, then plugins, then themes, in small groups.
- Test important pages after each step.
- Use a clone for risky updates.
- Choose auto-updates deliberately.
- Read the error log if something breaks.
If you need help reviewing performance or maintaining a server, see the server management services.
More server and WordPress guides are collected in the article archive.
Official references
Plesk Obsidian: WordPress Toolkit · WP Toolkit: Official site · WordPress Documentation: Updating WordPress · WordPress: Backups