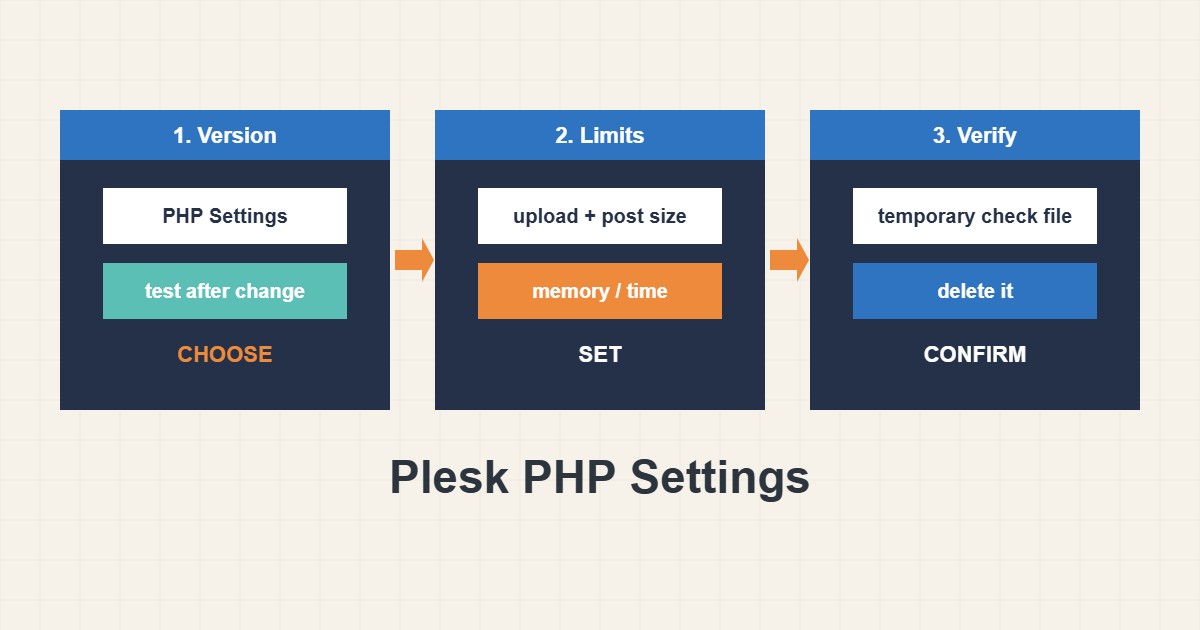
In Plesk, PHP is configured per domain. That is a strength, because one site can run a newer PHP version or higher limits without affecting the others, but it also means that “I changed PHP” can be true on one domain and not on another. This guide shows where to find the PHP settings of a domain in Plesk, how to choose a version and handler, how to raise upload and memory limits safely, and how to confirm the new values really apply. Screens vary a little with the Plesk version and with what your provider allows.
1. Open the PHP Settings of the domain
In Plesk open Websites & Domains, choose the domain and click PHP Settings. You will see the PHP version, the handler (how PHP runs, for example PHP-FPM) and a list of common settings such as memory limit, maximum execution time, post size and upload size. Changes here apply to this domain only, which is why a second site on the same server may show different values.
2. Choose a PHP version carefully
Use a supported PHP version that your WordPress theme and plugins support. Before you switch, take a backup (see the backup guide for the idea) and, if possible, test on a staging copy. Change the version, save, and open the front page and the admin area. If you see a fatal error, switch back to the previous version and update the plugin that failed. On cPanel the same task is described in the PHP version guide.
3. Pick the handler
The handler decides how PHP runs. Plesk usually offers PHP-FPM served by nginx or by Apache, and other modes. PHP-FPM is the modern choice for most sites because it manages worker processes and gives the domain its own pool. Do not switch handlers on a busy production site without a backup and a quiet period, since a change can briefly interrupt requests.
4. Raise limits the right way
For uploads, three values work together: upload_max_filesize, post_max_size and the time limit. Set post_max_size at least as large as the upload size. Use the form fields on the page for the standard options, and the Additional configuration directives box for others:
; Examples for 'Additional configuration directives' (one domain)
memory_limit = 256M
upload_max_filesize = 64M
post_max_size = 64M
max_execution_time = 120
log_errors = On
display_errors = Off
Do not set the limits far above what you need. A very high memory_limit multiplied by many requests can exhaust the server. For the reasoning behind limits on shared hosting see the upload and time limits guide.
5. Errors: log them, do not show them
On a production site set display_errors to Off and log_errors to On, so visitors never see paths and warnings but you can still read them in the domain error log. When you debug, turn display on only briefly, and then off again.
6. Confirm the values really apply
A setting that is saved is not always a setting that is active. Create a temporary file in the site root, open it once, read the values and delete it immediately:
<?php
// Temporary file phpcheck.php: remove it right after you read it
echo PHP_VERSION, ' | ', ini_get('memory_limit'), ' | ', ini_get('upload_max_filesize');
Compare the printed version and limits with what you set. If they differ, check whether the domain uses a different handler, whether a .user.ini or .htaccess override exists, and whether WordPress sets its own memory limit in wp-config.php. Leaving a diagnostic file public is a security risk, so remove it right away.
7. Illustrative example, not a measurement
Imagine a site owner raises upload_max_filesize to 64M but uploads of a 40 MB file still fail (a made-up case). The page showed post_max_size at 8M, which is smaller than the file, so PHP rejects the request before the upload limit matters. Setting both to 64M fixes it. The lesson is to change related values together and verify them with the temporary check file.
8. Common mistakes
- Changing the PHP version without a backup.
- Raising only upload_max_filesize and not post_max_size.
- Setting huge limits “just in case”.
- Showing errors to visitors on a live site.
- Leaving the diagnostic PHP file on the server.
- Assuming another domain has the same settings.
9. Frequently asked questions
Why do my changes not apply? The value may be overridden elsewhere, the wrong domain may be edited, or the web service may need a moment. Verify with a temporary check file.
Which PHP version should I choose? The newest supported version that your code and plugins work with. Test first.
Do I need to restart anything? Plesk applies most changes automatically. If a value does not change, check overrides before restarting services.
Can I set different limits for two sites? Yes, because PHP settings are per domain in Plesk.
10. Quick checklist
- Open Websites & Domains, then PHP Settings for the right domain.
- Back up before switching versions.
- Test the front page and admin area after a change.
- Raise upload and post size together.
- Keep display_errors off and log_errors on.
- Verify with a temporary file and delete it.
- Review limits when a plugin changes its needs.
If you need help reviewing performance or maintaining a server, see the server management services.
More server and WordPress guides are collected in the article archive.
Official references
Plesk Obsidian: PHP Management · Plesk Obsidian: PHP Settings · PHP Manual: Core php.ini directives · PHP: Supported versions