
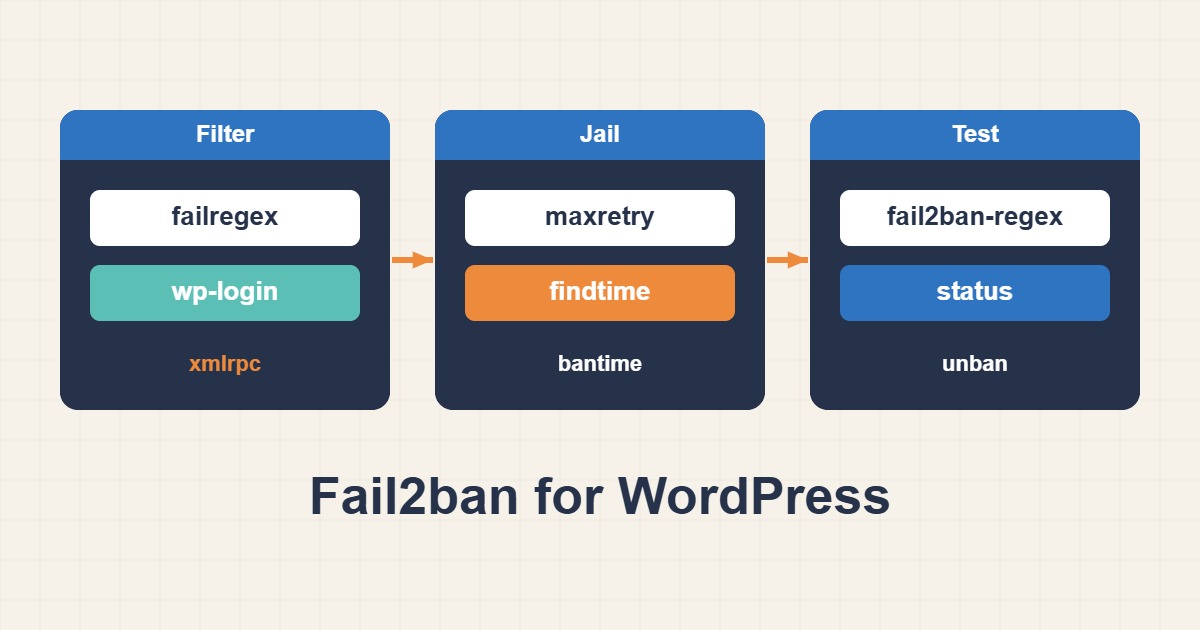
Every public WordPress site gets hammered by automated login attempts, and most of them are harmless noise until the day they are not: a weak password, a plugin with a flaw, or simply so many requests that PHP-FPM workers fill up. Fail2ban reads your Nginx logs, spots repeated failures from the same address and asks the firewall to block it for a while. This guide shows how to set up Fail2ban for Nginx and WordPress login protection without banning your own visitors, how to test a filter before you trust it, and how to undo a ban when something goes wrong.
1. What Fail2ban actually does
Fail2ban follows log files and applies a filter, which is a set of regular expressions, to each new line. When one address matches the filter too many times within a time window, a ban action runs, usually adding a firewall rule. After the ban time expires the rule is removed. Three numbers control this: maxretry (how many matches), findtime (inside what window) and bantime (how long the ban lasts). It reacts after the fact, so it complements rate limiting rather than replacing it.
2. Install it and check the service
sudo apt install fail2ban
sudo systemctl enable --now fail2ban
sudo fail2ban-client status
An empty jail list on a fresh install is normal, because the packaged defaults usually enable only the SSH jail. If you already run Fail2ban for SSH, the hardening guide Harden SSH on Linux with Keys and Fail2ban covers that jail, and this article adds the web side.
3. Never edit jail.conf
Package updates overwrite /etc/fail2ban/jail.conf. Put your settings in /etc/fail2ban/jail.local or in a file under /etc/fail2ban/jail.d/ with a .local suffix, and they survive upgrades. Anything you define there overrides the packaged default of the same name.
4. Make sure the log shows the real client IP
This is the most common and most damaging mistake. If Nginx sits behind a CDN or load balancer and logs the proxy’s address, Fail2ban will happily ban the CDN, which blocks every visitor at once. Before you enable any web jail, confirm that the address at the start of each access-log line is the visitor’s, not the proxy’s. Restore Real Client IPs Behind a Trusted Proxy in Nginx explains how to restore the real address behind a trusted proxy.
5. Enable the built-in Nginx jails
Fail2ban ships filters for common Nginx problems. Two useful ones are nginx-http-auth, which catches failed HTTP basic authentication, and nginx-limit-req, which bans addresses that keep tripping your rate limit. A starting configuration in jail.local:
[DEFAULT]
bantime  = 1h
findtime = 10m
maxretry = 5
ignoreip = 127.0.0.1/8 ::1 203.0.113.10

[nginx-http-auth]
enabled = true
port    = http,https
logpath = /var/log/nginx/error.log

[nginx-limit-req]
enabled = true
port    = http,https
logpath = /var/log/nginx/error.log
Put your own address in ignoreip so you cannot ban yourself. The nginx-limit-req jail reads the error log lines that Nginx writes when limit_req rejects a request, so it only works if you use rate limiting. See Configure Nginx Rate Limiting for Login and API Abuse for that part.
6. Write a filter for wp-login.php and xmlrpc.php
A failed WordPress login returns the login form again with a 200 status, while a successful one redirects. That means repeated POST requests to wp-login.php that end in 200 are a good signal for brute force. Create /etc/fail2ban/filter.d/wordpress-login.conf:
[Definition]
failregex = ^<HOST> .* "POST /wp-login\.php.*" (200|403)
            ^<HOST> .* "POST /xmlrpc\.php.*" (200|403)
ignoreregex =
The <HOST> tag captures the client address and assumes the common combined log format, where the address comes first on each line. If your log format differs, adjust the pattern. Note that a legitimate user who mistypes a password a few times also produces 200 responses, which is why maxretry should not be set too low.
7. Add the jail
[wordpress-login]
enabled  = true
port     = http,https
filter   = wordpress-login
logpath  = /var/log/nginx/access.log
maxretry = 5
findtime = 10m
bantime  = 1h
This jail bans an address after five matching requests within ten minutes, for one hour. Those numbers suit a typical small site. A site with many real editors behind one office IP should raise maxretry or add that office address to ignoreip.
8. Test the filter before enabling it
sudo fail2ban-regex /var/log/nginx/access.log /etc/fail2ban/filter.d/wordpress-login.confThe fail2ban-regex tool runs the filter against a real log and prints how many lines matched and which ones. Check that it matches the failed logins you expect and does not match normal page views. A filter that matches too much bans innocent visitors, so never skip this step.
9. Reload, inspect and unban
sudo fail2ban-client reload
sudo fail2ban-client status wordpress-login
sudo fail2ban-client set wordpress-login unbanip 203.0.113.50
After reload, status shows currently failed and banned counts and the list of banned addresses. The unbanip command removes a ban immediately, which you will want the first time a colleague locks themselves out. Keep a second way into the server, such as the provider console, while you test.
10. Increase ban times for repeat offenders
Recent Fail2ban releases (0.11 and later) can lengthen the ban each time the same address returns:
bantime.increment = true
bantime.factor = 2
bantime.maxtime = 1w
With these values the first ban is one hour, the next roughly double, up to a week. This catches slow, patient bots without punishing a one-off mistake too hard.
11. Docker and CDN caveats
If Nginx runs in Docker with published ports, traffic is forwarded through chains that a ban rule in the host’s INPUT chain may never see. Configure the ban action to use the DOCKER-USER chain or block at an edge firewall instead. If a CDN proxies all traffic, a ban at your origin firewall only helps for the CDN’s address, so use the CDN’s own firewall rules or API for real blocking.
12. Common mistakes
- Banning a CDN or proxy because the log shows its address.
- Editing
jail.confinstead ofjail.local. - Setting
maxretryto 1 or 2 and banning real users. - Not putting your own address in
ignoreip. - Skipping
fail2ban-regexand trusting a copied filter. - Treating Fail2ban as a replacement for strong passwords and two-factor login.
13. What healthy output looks like
The block below is an illustration of the shape of the status output, not a measurement from a real server:
Status for the jail: wordpress-login
|- Filter
|  |- Currently failed: 2
|  |- Total failed:     14
|  - File list:        /var/log/nginx/access.log
- Actions
   |- Currently banned: 1
   |- Total banned:     3
   - Banned IP list:    198.51.100.23
A few failed attempts, a small number of bans and an address list that looks like scanners rather than your customers is a good sign. If the banned list contains addresses you recognise, stop and review the filter and the log format.
14. Logs, rotation and legitimate xmlrpc traffic
Fail2ban notices when a log file is rotated and keeps following the new one, so ordinary logrotate setups do not need special handling. The risk is the opposite: a very long findtime on a busy log makes every scan slower, so keep it to minutes, not days. Also think about who legitimately calls xmlrpc.php. Jetpack and some mobile apps use it, and a filter that bans that path can block their servers. If you rely on such a service, remove the xmlrpc.php line from the filter or add the service’s addresses to ignoreip.
15. Layers that work alongside Fail2ban
Fail2ban is one layer, not a complete defence. Rate limiting in Nginx slows a burst before it ever reaches PHP, strong unique passwords and two-factor login make guessing pointless, and a firewall rule at the CDN edge stops traffic before it reaches your server at all. Use them together: Fail2ban removes the persistent offenders, rate limiting absorbs the spikes and authentication hardening protects the accounts that matter.
16. Quick checklist
- Confirm the access log shows real client IPs.
- Put settings in
jail.local, with your own address inignoreip. - Write the filter and test it with
fail2ban-regex. - Enable the jail, reload, and check
fail2ban-client status. - Keep a second access path and know how to run
unbanip.
More server guides are collected in the article archive.
Official references
Fail2ban documentation · Fail2ban project wiki · Nginx ngx_http_log_module · WordPress: Brute Force Attacks